***NOTICE*** I will be more "how-to-carve" pictures soon. Don't know why some of the pictures are yellow :-/
There are two basic tools used to carve your own stamp 1) Exacto Knife and 2) Gouging tools.
I have found over the last year and a half nearly all carvers fall into one camp or the other, I can't recall many who use both tools regularly . . . its one or the other. Funny thing is, both think the other is "impossible" to carve with and yet I've seen the most spectacular carvings from people who use the gouging tools as well as from people who use the exacto knife.
Carving with an exacto knife isn't as difficult as it seems, though there have been times with some tiny details when it seems I'm performing brain surgery with a chainsaw!
My first 40 carves were all on Pink Pearl erasers, this proved to be beneficial for me as I learned how to carve details onto a small medium. Pink erasers proved to be rather "tough" to carve as well, so when I graduated to PZ Kut it was smooth as butter.
Before I get to the step-by-step process let me lay down a couple of basic rules;
Rule #1 Never under estimate your carving abilities!
If your going to carve a stamp of a hot air balloon, don't just carve an "empty" balloon, like that of the first image. Add detail to the balloon, even simple detail will give you practice. Push your boundaries, don't limit yourself and the next thing you know you'll be carving realistic images that amaze even yourself!
At first I refused to carve a person unless I had a "clip art" version or a line drawing version to go from. Now I only use actual photographs of the subject . . . the images become life like.
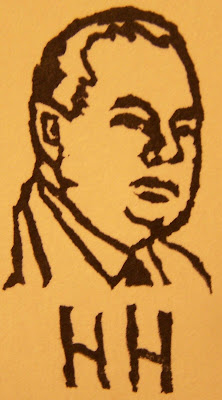 [[Herbert Hoover my 15th carve Dec. 24, '06 from a line drawing on a pink eraser.]]
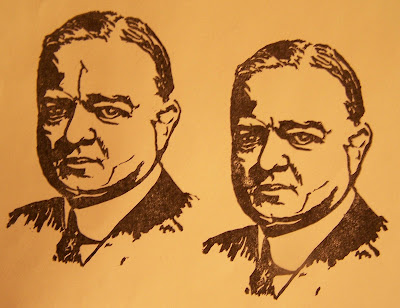 [[Herbert Hoover my 71st carving August 13, 2007 from a photograph. Notice I left a line in the forehead that I later decided to cut out.]]
Rule #2 Be patient!
Don't rush your carve. My average "Pink Eraser" carve takes between 1-2 hours, while my "portraits" (that measure 2 1/2" x 1 1/2") take between 5-8 hours. I've had two stamps that took me 15-20 hours.
 [["A New Covenant" 15 hour carve.]]
They don't get done in one sitting. If your eyes get heavy or you get bored put the carving aside until the next day. Sometimes I put a carving aside and a few hours later I'm ready to carve more.
There are two things you never want to do, 1) rush a carve & 2) carve while tired. It's during these two scenarios that mistakes are made and your carving turns out like the sphinx -- missing a nose!!
After committing to my two rules you're ready to carve portraits (or anything else)!
Step #1 Find an image.
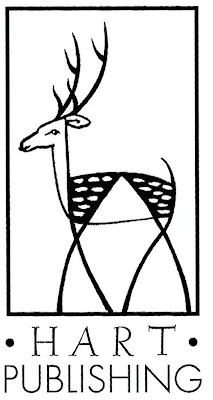
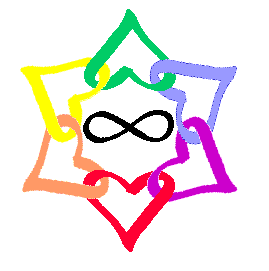
Whether its for a new signature stamp, a person, place or thing you need to find the right image. I use Google image search and type in search terms. For example for our trail name, Hart x6, I type in "Hart" (which is a small red deer) and find this image; which would make a nice signature stamp, so I save it in an Email to myself and keep on searching. Next I search "heart" and find then I type "heart clip art" and find then I type "six hearts" I could go on. The point is to type in as many combinations as you can to find just the right image.
**WARNING** Google sometimes lets an inappropriate image slip through the cracks and even though you type in something totally innocent, you may have a R-rated image pop up.
Step #2 How do you get a carving image off of a photograph?
First find a picture you would like to carve and save it to your hard drive. I use my Kodak Picture Maker, after bringing up the picture in my "photo shop" I hit "coloring book effect" and it converts the image into a line drawing. You can get the same effect at this website, Pencil Sketch.
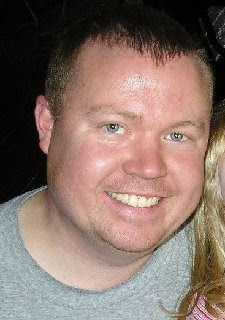
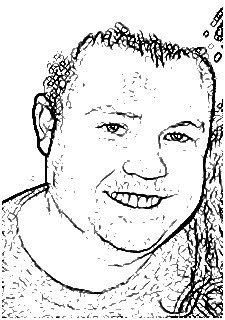
You will notice that the "pencil sketch" may "butcher" the picture and make it all but unintelligible, as it adds some lines and completely whites out black portions of the picture . . . as with the image of my self portrait where it eliminates the top of my head.
I open up a new Email to myself and insert the actual picture I'm going to carve, then right next to the actual picture I insert a saved copy of the "pencil sketch" of the same image. I then re-size them to the desired size. I then have two choices, 1) to use the "pencil sketch" image or 2) use the actual picture image.
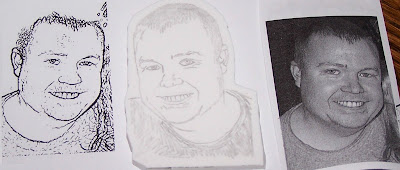 [[Self Portrait using the actual photo.]]
Option 1) using the "pencil sketch" image. I will use tracing paper, though the sketch kinda butchers the actual image it is perfect for getting the exact shape, size and proportions just right. I will be glancing back and forth at the actual picture for added detail and shading that doesn't show up in the pencil sketch image. When done, the image on the tracing paper will look more like the actual picture than the pencil sketch image that you used. Don't be afraid to add in as much detail and shading as possible, you can always "carve out" lines you don't want to remain in the image.
Flip the tracing paper over on top of your carving medium and rub the back of the tracing with your pencil and viola, you're ready to carve!
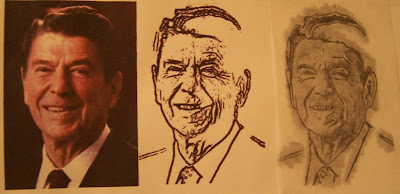 [[Ronald Reagan using Tracing paper.]]
Option 2) using the actual picture. I have come to use this technique more often than not, you just draw with your pencil on the image itself. Make sure your pencil is as sharp as possible so that you can draw all the small details. There will be times when you refer back to the pencil sketch to see where it has a line (as in my self portrait, in the photo my neck & nose lines are harder to decipher, I refer back to the pencil sketch to see where it placed those lines).
**Note** from time to time hold up your image at an angle to a light so you can see your pencil lines shine. This will help you see where you may have missed a spot. This is *extremely* important just before you transfer your image. If your missing a portion of the image, now is the time to catch it . . . not after its on the carving medium.
As with the tracing paper, flip your image over and rub the back with the tip of the pencil and viola, you're ready to carve!
Ok, ok, don't carve yet. Before you carve you want to give the transferred image a good look over. Make sure all lines are visible . . . I have added shading at this point in the game. Make sure its what you want before digging in.
Step #3 Digging in!!
Sometimes before I "dig in", I'll take my carving block with the image on it and go over it with my exacto knife -- *not* actually cutting, just going through the motions. I'm not sure if I do this to motivate myself, or for practice. Either way, I go through the motions before I actually make my first cut . . . once you make your first cut, you're committed.
A rule of thumb recommended by many is to start with the most difficult area of the carve. If you are carving a human start with the eyes . . . if you screw up now you haven't invested much time and can easily start over.
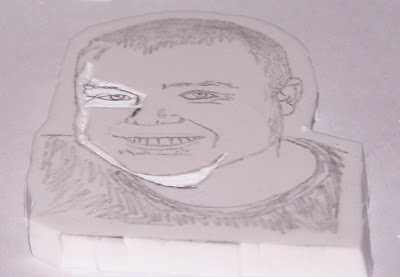 [[What you see here took me about an hour. I started with the eye and worked down the side of my face.]]
If you are carving letters or numbers carve the insides of the "o, p, b, d, q's or 8's" first. Once you carve the outsides your image will be more unstable and more difficult to cut out the insides.
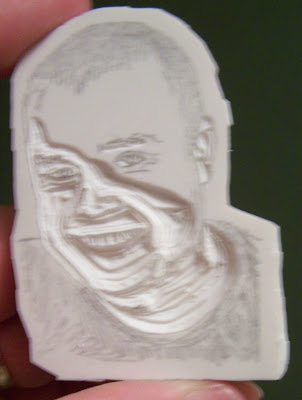 [[Sorry its blurry. This is about 3 hours total carving time. The time is in the details, the large areas like the neck and cheeks don't take nearly as long as the eyes or hair.]]
I hold my exacto knife just as I would a pen or pencil, my fingers close to the tip for optimal precision. I cut towards myself (don't tell my mom, but I have drawn blood before) focusing on two cutting points; the first cutting point is the part of the blade that is at the surface of the image . . . I keep it close to the pencil lines and make sure that it keeps on course. Second is where the tip of the blade is under the surface of the cutting block.
If you are carving small details or lettering you want shallow cuts while if you have a large open area you can plunge the blade deeper into the carving medium. Say I'm carving a triangle, I'll start in a corner with a shallow cut and push the blade in deeper towards the center of the line and draw the blade back out as I near the next corner.
 [[This picture illustrates the shallow cuts around the eyes and hair, while the neck/cheeks & forehead have deeper cuts]]
When you go to dig out a piece of material you want removed start in the corners and pull toward the center -- I've made critical errors in the past where I try removing a piece from my carving pulling toward the image and next thing you know you remove something that should have remained. Example of a line that should have remain on Jesus' arm in my Woman at the Well stamp that was accidentally removed.
When carving many rectangles right next to each other, or between spokes of a bikes tire first carve out one and the first cut on the next one should be the closest line to the one you just carved out. You will want to carve out each rectangle individually as opposed to cutting all the length lines on every rectangle, turning the medium and carving all the opposite length lines . . . I tried this once on my Columbus stamp and you will see the trial and error.
When carving any curve you will want to move your carving material and not your blade.
Refer back to Rule #2 Be Patient! Take your time, get all those small details that you're telling yourself that you "just can't do," I'm telling you that you *can* do it. Use your exacto blade like a pen or pencil, get down close to your work (or use a magnifying lens) so you can see what you're doing and make sure you have adequate light.
Step #4 Double Check Everything!
Now that you're done with your carving double check everything. Comb over every detail of the carve and make sure you didn't miss anything. Remove debris and crumbs left over from your labors. This is the last opportunity you have before inking up to cut away something you forgot.
Once you ink up (unless a real light color ink) you will have a hard time making extra cuts after the fact.
Step #5 My Favorite Part!
Inking up your stamp for the first time, ahhh.
When you first start working you have a nice clear image on your carving block, once you start cutting the image seems to get butchered and once you are done you really have no idea how it will really look.
The first time you tap that ink pad on your stamp your image will jump out at you and you will get a chill down your back (or is that just me?). You still don't know exactly how it will look... not until you put the image on paper will you know that!
Step #6 Examine
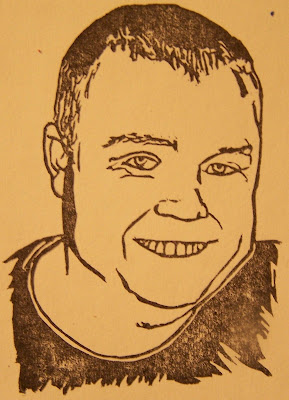 [[First print of my Self Portrait]]
Examine your first stamped image, you will no doubt have what I call "clutter," edges around your image that were meant to be carved out. The closer you look at your image the more spots you will see! Look at all the details and go back to your carving and remove whatever clutter you can.
You will also want to remove any "flecks" of material that are laying on your image.
Be careful at this point that you only remove what is not wanted and not part of the image that was supposed to be left.
Tip: If you have a fairly large area that would look better cut out, and not realizing it until after you made your first stamp, use a ballpoint pen to make lines on the ink . . . you will be able to see these lines better for your final cuts. I had this happen to the shadow on my cheek in my self portrait.
You're done!!
I hope this helps, even if just a little. Please use the comment feature to ask me further questions or for clarifications.
Happy carving!!!
Any Questions or comments are welcome, please Email me at; Mathw613@aol.com


